How to build a Node.js chat app with Socket.io
Let's build a chat app!
What is Socket.io?
Socket.io is a Javascript library to develop real-time web applications. It works with the WebSockets technology, enabling bidirectional, full-duplex communication between the client and the server. That means both the server and the clients can communicate any form of data in both directions.
Socket.io provides a module for Node.js and a library that runs in the browser to enable client-side communication.
Alternatives to socket.io
We’re covering Socket.io instead of some of the many alternatives (SignalR, SocketCluster, PubNub, Firebase, Apollo Subscriptions) because it’s simple, it has large community support and widespread useGeven by companies such as Microsoft.
There’s also not much magic happening behind the scenes. Socket.io is really just a wrapper for WebSockets with easier usage and some fancy add-ons such as broadcasting to multiple sockets.
When should you use Socket.io?
Building a real-time web app can be done with a wide array of technologies. Sticking to the native ones, we have: WebRTC, WebSockets and HTTP Long Polling.
Polling is the easiest to implement however consumes far more resources and does not scale. WebRTC is powerful and allows VOIP, video calling, and other complex use cases, but is complex to implement. For anything outside of VOIP and video calling, WebSockets provides the right balance and ease of use.
So when should we use it? A few real-time applications are:
- Chat applications like Messenger and Whatsapp
- Collaboration applications like Google Docs
- Games that require realtime, low latency input
- All applications that require some form of polling mechanisms
Socket.io leverages the power of WebSockets to handle these use cases and more. In this article, we’re going to demonstrate one of these scenarios by building a chat application.
Building a simple chat app with Socket.io
We are going to build a simple chat using a Node.js web framework, called Express. Once we hook up socket.io, we’re going to implement a basic page users can use to enter their name and send messages.
Before we start building the application, make sure you have installed node.js.
Creating and configuring the package.json manifest file
1. It is usually recommended to place the package.json file in a dedicated directory so start by creating a new directory in your file system and name it. In my case, it will be SocketsChat .
2. Open your command line and navigate into the directory you just created
3. Execute npm init command. We will be configuring the file using a CLI questionnaire.
4. Set the entry point to server.js and you may skip the rest of the questions. After the confirmation, the package.json file will be created inside the directory.
5. Add express and socket.io dependencies by simply executing the following commands:
npm install express
npm install socket.io
After the installation, package.json file will be updated automatically and it should be similar to the following configuration.
{
 "name": "socketschat",
 "version": "1.0.0",
 "description": "",
 "main": "server.js",
 "scripts": {
   "test": "echo \"Error: no test specified\" && exit 1"
 },
 "author": "",
 "license": "ISC",
 "dependencies": {
   "express": "^4.17.1",
   "socket.io": "^3.0.5"
 }
}
Setting up the server-side
Having the package.json file created, now you need to configure your server by creating a server.js file in the same directory as the package.json
The server.js file is where we set up the backend process of our application. Include the following in your server.js file. We’ll go over what’s going on below:
const application = require('express')();
const server = require('http').createServer(application)
const io = require('socket.io')(server);
const PORT = process.env.PORT || 3000

application.get('/', (req, res) => {
   res.sendFile(__dirname + '/index.html');
});

server.listen(PORT, () => {
   console.log('Server is running on port: ' + PORT);
});

io.on('connection', (socket) => {

   socket.on('disconnect', () => {
       console.log('User disconnected - Username: ' + socket.username);
   });

   socket.on('new message', (msg) => {
       io.emit('send message', {message: msg, user: socket.username});
   });

   socket.on('new user', (usr) => {
       socket.username = usr;
       console.log('User connected - Username: ' + socket.username);
   });
});
In this snippet, we are:
- Initialising a new instance of express
- Creating a new instance of Socket.io, and passing it our express instance
- Initialise the port, which the server should listen to. It is always good to provide an alternative port in case the environment port is not available
- Define a route
/that will navigate to theindex.html, representing the client-side of our application. Client-side will be created in the next step - Start listening. Once the server starts listening, you can see the port number printed in the console
- Set socket.io to start listening for connection events
- Handle a disconnect event for each socket which prints the username of the disconnected user
- Handle a new message event that sends all message objects to the server via an emit method. These objects contain the message, as well as the username of the sender. They are being sent to all users, including the sender, as a send message event
- When a user enters their username on the client-side, the server receives it as a new user event and prints a connection message along with the username of the connected user
Setting up the client-side
Now that our server is ready for action, let’s set up the client-side. All we need to do is create an index.html file that would handle the interaction with the user. This file needs to be created in the same directory. If you want to make things look a bit nicer, feel free to add some styling in a separate CSS file. Back to our index.html file, let’s have a look at what we have here:
<!DOCTYPE html>
<html>


<body>
<ul id="message_list"></ul>
<form id="message_area" action="">
    <input id="text_area" autocomplete="off" />
    <button>Send</button>
</form>

<script>
    const socket = io();

    const username = window.prompt("Enter the username");
    socket.emit('new user', username);

    const messageForm = document.getElementById('message_area');
    const textInput = document.getElementById('text_area');

    messageForm.addEventListener('submit', function(e) {
        e.preventDefault();
        if (textInput.value) {socket.emit('new message', textInput.value);
            textInput.value = '';
        }
    });

    socket.on('send message', (data) => {
        const messageList = document.getElementById('message_list');
        const chatItem = document.createElement('li');
        chatItem.textContent = data.user + ': ' + data.message;
        messageList.appendChild(chatItem);
        window.scrollTo(0, document.body.scrollHeight);
    });
</script>

</body>

</html>
We’re doing a few things:
- Starting from the
<head>, we’re loading socket.io-client as an external. After that, we’re initialising a socket instance in the<script>tag. - Creating a form
<body>, containing an input field and a send button. - Creating a list in the
<body>for all sent messages. - Whenever a user connects to the server, we’re asking for a username.
- When clicking the send button, the text from the input field will be sent to the server as a new message event.
- We’re populating the list of messages whenever we receive a send message event from the server.
Broadcasting
So far we used the Socket.io emit() method to send an event to every socket. However, if it is required to prevent sending the event for a particular emitting socket, you can use the broadcast flag as shown below.
socket.broadcast.emit('Broadcasting');
Testing out our chat app
That’s it! Now that we have both sides configured, let’s see how they work together.
Start the server by executing npm start in the terminal. After the build is complete and you see the port, where your app is hosted, go ahead and open it in the browser.
Moving on, we’re on http://localhost:3000 now. If you have been following all of the above steps carefully, you should be able to see this:
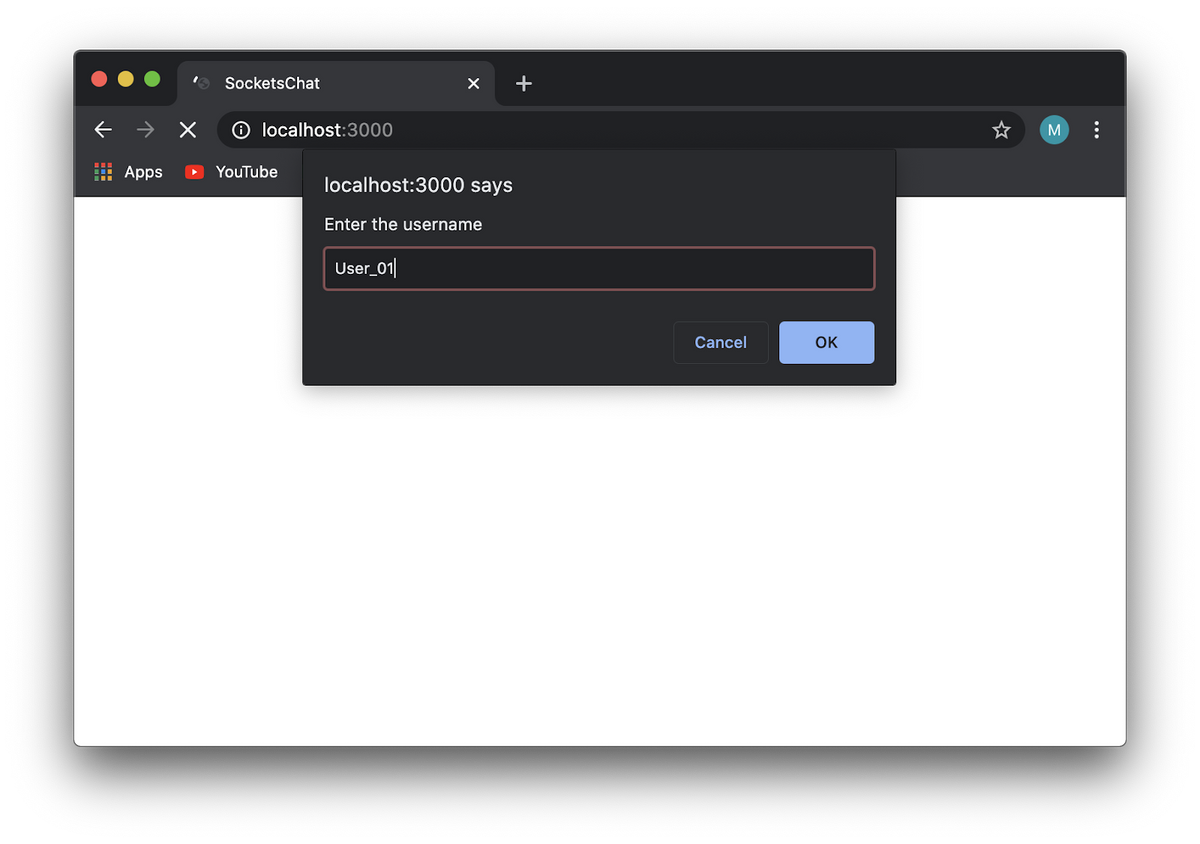
Step 1: Enter username
To make things more interesting (and less lonely), we’re going to open our app in two different tabs. After entering a username in each tab, we’re ready to start chatting!
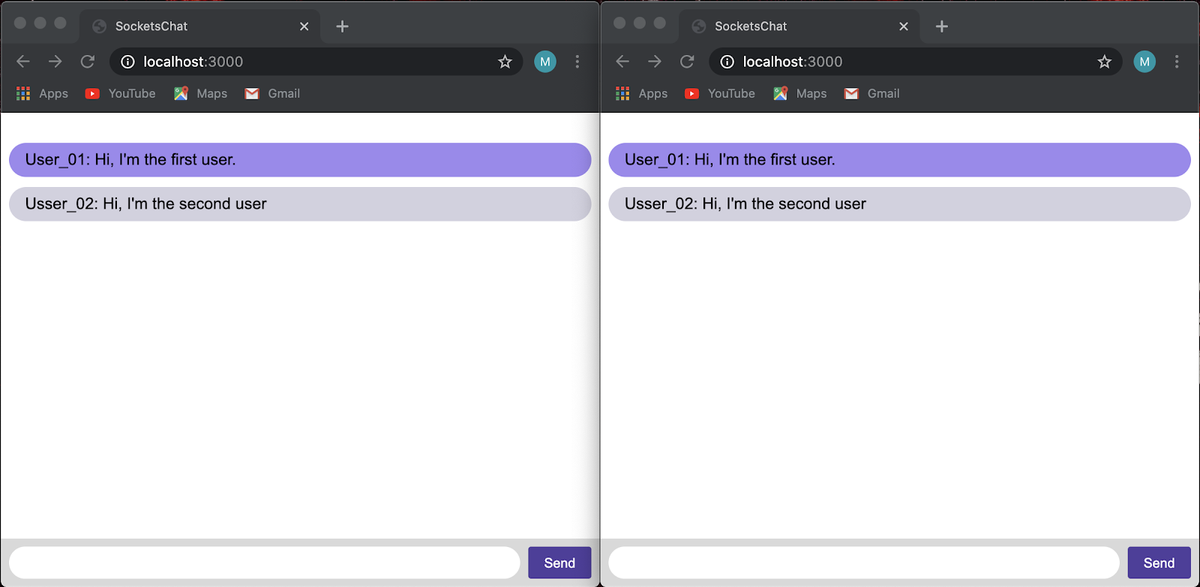
Chat in action
Now you have a clear idea of how the chat application works with the help of the event-based, bidirectional and real-time communication feature of Socket.io.
Conclusion
By now, you’d know that Socket.io implementation of the traditional WebSockets is one of the best options for developers who want to implement real-time applications. With the adoption of Node.js, Socket.io played a major role in making WebSockets more accessible. This Javascript library makes the development process of many applications more convenient and enhances the efficiency of transferring information through the web.
Tags

David Stellini
3rd March 2021